This comprehensive SharePoint Permissions Guide was a true collaboration between human expertise and AI efficiency! Directed by Brett Lonsdale, your guide’s creator (and seasoned Microsoft 365 MVP), and crafted in partnership with ChatGPT, this resource brings together clear steps, expert insights, and practical tips. Every section was thoughtfully shaped through a series of prompts, ideas, and refinements to ensure the guide is as informative as it is easy to follow. In fact, you can see the behind-the-scenes action in the video, where we brought this guide to life together. Enjoy exploring, and here’s to better SharePoint permissions for all!
^ That was written by ChatGPT too
Introduction to SharePoint Permissions
Permissions management is essential in SharePoint Online to balance secure collaboration and accessibility. This guide covers the SharePoint permissions model, best practices, advanced management tools, and actionable steps, empowering administrators to manage permissions confidently and effectively.
1. Roles and Responsibilities in Permissions Management
In SharePoint, permissions management is a collaborative responsibility involving multiple roles across the organization to ensure a secure and accessible environment.
IT Administrators configure the overall permissions framework and maintain access controls across all sites and site collections. While they set up the foundational permissions structure and conduct periodic audits, IT Administrators may not have the granular insight into specific projects or teams, making them reliant on Site Owners for precise access management.
Chief Information Security Officers (CISOs) establish organization-wide policies and permissions guidelines focused on data protection and compliance. They collaborate with IT to set overarching security policies, such as external sharing restrictions, which Site Owners then implement and monitor within their sites.
SharePoint Site Collection Administrators manage permissions at the site collection level, ensuring settings are consistent with organizational standards. They handle global configurations and permissions across the collection but rely on Site Owners to make site-specific decisions that align with team or project needs.
SharePoint Site Owners are pivotal in managing permissions within their individual sites in a decentralized manner. Site Owners are closest to their teams, projects, and content, making them the best-positioned to determine who should have access and at what level. While IT and CISOs can provide policies and best practices, Site Owners ensure that access is appropriately assigned based on direct knowledge of project roles and team responsibilities. They manage day-to-day permissions tasks, such as approving access requests, revoking access when team members leave, and breaking inheritance on specific libraries or lists for added control. By decentralizing permissions at the site level, Site Owners ensure that access remains relevant, up-to-date, and aligned with the dynamic needs of their teams.
Site Members are the everyday collaborators within SharePoint. They follow sharing guidelines, choosing appropriate access levels and adhering to the organization’s permissions policies. Site Members are responsible for requesting access when necessary and understanding the importance of “View” vs. “Edit” permissions for responsible sharing.
This decentralized approach allows permissions to be managed efficiently and accurately at the team level, with Site Owners ensuring that only the right people have access to their content. By empowering Site Owners with this responsibility, IT Administrators and CISOs can maintain secure policies and oversight without needing a granular understanding of each team’s specific needs, creating a balanced and secure SharePoint environment.
2. SharePoint Permissions Model Overview
Permissions Hierarchy and Flow
In SharePoint, permission inheritance is a system that automatically cascades permissions from a higher-level site down through its subsites, lists, libraries, folders, and individual files. This setup simplifies permissions management by allowing permissions applied at a root site to propagate consistently across all related content. However, there are times when breaking permission inheritance becomes necessary. For example, if a specific library or folder contains sensitive information accessible only to select users, breaking inheritance allows for unique permissions on that content. By breaking inheritance thoughtfully and sparingly, organizations can maintain a balance between broad access for collaboration and targeted control over confidential information.
- Site Collection: The top level, where permissions apply across all subsites, lists, and items by default.
- Subsite: Inherits permissions from the root site (site collection) unless custom permissions are applied.
- List & Library: Inherits permissions from the subsite but can have unique permissions for more granular control.
- Folder and Item Levels: Inherits permissions from the library but can be customized for sensitive content.
Tip: Breaking inheritance should only be done when necessary, as unique permissions increase complexity and the potential for errors.
Default Permission Levels
| Permission Level | Common Use | Capabilities |
|---|---|---|
| Full Control | Site owners | Manage permissions, settings, and content |
| Design | Power users | Edit pages, manage lists, approve items |
| Edit | Content editors | Edit and manage list items |
| Contribute | Team members, reviewers | Add and edit list items |
| Read | Viewers | View content |
| View Only | Limited viewers | Restricted view-only access |
In SharePoint, managing access effectively relies on understanding both Permission Levels and Permissions. Permission Levels are predefined groups of individual permissions that determine what users can do within a site, library, or document. Examples include “Full Control,” “Edit,” “Contribute,” and “Read,” each granting different levels of access, from complete control over site settings to view-only access.
Beneath these levels are the specific Permissions—the actions a user is authorized to perform, like viewing, editing, creating, or deleting content. SharePoint groups these individual permissions into logical levels, making it easier for administrators to assign the appropriate access based on a user’s role. By carefully choosing permission levels, organizations can ensure that users have the access they need to perform their roles efficiently, without granting excessive control. Additionally, administrators can create custom permission levels to tailor access for unique scenarios, allowing for a balance between usability and security in collaborative environments.
| Individual Permission | Full Control | Design | Edit | Contribute | Read | Limited Access |
|---|---|---|---|---|---|---|
| Manage Permissions | ✔️ | |||||
| View Pages | ✔️ | ✔️ | ✔️ | ✔️ | ✔️ | ✔️ |
| Add and Customize Pages | ✔️ | ✔️ | ✔️ | |||
| Apply Themes and Borders | ✔️ | ✔️ | ||||
| Apply Style Sheets | ✔️ | ✔️ | ||||
| Create Subsites | ✔️ | |||||
| Edit Items | ✔️ | ✔️ | ✔️ | ✔️ | ||
| Delete Items | ✔️ | ✔️ | ✔️ | ✔️ | ||
| View Items | ✔️ | ✔️ | ✔️ | ✔️ | ✔️ | ✔️ |
| Open Items | ✔️ | ✔️ | ✔️ | ✔️ | ✔️ | ✔️ |
| View Versions | ✔️ | ✔️ | ✔️ | ✔️ | ✔️ | |
| Delete Versions | ✔️ | ✔️ | ✔️ | |||
| Create Alerts | ✔️ | ✔️ | ✔️ | ✔️ | ✔️ | |
| Use Self-Service Site Creation | ✔️ | |||||
| View Application Pages | ✔️ | ✔️ | ✔️ | ✔️ | ✔️ | |
| Enumerate Permissions | ✔️ | |||||
| Browse Directories | ✔️ | ✔️ | ✔️ | ✔️ | ✔️ | |
| View Information Rights Management | ✔️ | |||||
| Manage Personal Views | ✔️ | ✔️ | ✔️ | ✔️ | ||
| Add/Remove Personal Web Parts | ✔️ | ✔️ | ✔️ | ✔️ | ||
| Update Personal Web Parts | ✔️ | ✔️ | ✔️ | ✔️ | ||
| Manage Lists | ✔️ | ✔️ | ✔️ | |||
| Add Items | ✔️ | ✔️ | ✔️ | ✔️ | ||
| Edit Items | ✔️ | ✔️ | ✔️ | ✔️ | ||
| Delete Items | ✔️ | ✔️ | ✔️ | ✔️ | ||
| Approve Items | ✔️ | ✔️ | ||||
| Open | ✔️ | ✔️ | ✔️ | ✔️ | ✔️ | ✔️ |
| View Pages | ✔️ | ✔️ | ✔️ | ✔️ | ✔️ | |
| View Pages and List Items | ✔️ | ✔️ | ✔️ | ✔️ | ✔️ |
SharePoint Groups: Each SharePoint site includes default groups—Owners, Members, and Visitors—which simplify permissions management. The Owners group, by default, has the Full Control permission level, enabling members to manage permissions, settings, and content. The Members group typically has the Edit permission level, allowing users to add, edit, and delete content within the site. These groups make it easy to assign standardized access levels across common roles without customizing permissions for each individual. Additionally, SharePoint allows administrators to create custom groups for specialized roles, such as “Project Contributors” or “HR Approvers,” with tailored permission levels that fit specific needs.
- Microsoft 365 (M365) Groups: M365 Groups are unified groups that connect SharePoint with other Microsoft 365 applications like Outlook and Teams. When an M365 Group is linked to a SharePoint site, all members of the group inherit Edit permissions by default, granting them access to collaborate within the site. Changes to an M365 Group’s membership cascade across all linked applications, ensuring consistent access. However, because M365 Groups connect across multiple tools, it’s best to use them for cross-functional teams requiring shared access, rather than for highly restricted sites where granular control over permissions is essential.
- Entra Security Groups: Entra Security Groups are managed within Azure Active Directory (AD) and are especially useful for centralized, organization-wide permissions management. By adding an Entra Security Group to a SharePoint Group (such as Members or Owners) or assigning it directly to a site, administrators can provide broad access efficiently without needing to manage individual users within SharePoint. This approach is ideal for large organizations or departments, as security groups offer centralized management and can streamline permissions changes as users join or leave.
Tip: Always create new custom permission levels rather than altering defaults. This preserves consistency and minimizes unintended changes.
Resource: Default SharePoint Permission Levels
3. Types of Groups in SharePoint Permissions
SharePoint Groups: Each SharePoint site includes default groups—Owners, Members, and Visitors—which simplify permissions management. The Owners group, by default, has the Full Control permission level, enabling members to manage permissions, settings, and content. The Members group typically has the Edit permission level, allowing users to add, edit, and delete content within the site. These groups make it easy to assign standardized access levels across common roles without customizing permissions for each individual. Additionally, SharePoint allows administrators to create custom groups for specialized roles, such as “Project Contributors” or “HR Approvers,” with tailored permission levels that fit specific needs.
Microsoft 365 (M365) Groups: M365 Groups are unified groups that connect SharePoint with other Microsoft 365 applications like Outlook and Teams. When an M365 Group is linked to a SharePoint site, all members of the group inherit Edit permissions by default, granting them access to collaborate within the site. Changes to an M365 Group’s membership cascade across all linked applications, ensuring consistent access. However, because M365 Groups connect across multiple tools, it’s best to use them for cross-functional teams requiring shared access, rather than for highly restricted sites where granular control over permissions is essential.
Entra Security Groups: Entra Security Groups are managed within Azure Active Directory (AD) and are especially useful for centralized, organization-wide permissions management. By adding an Entra Security Group to a SharePoint Group (such as Members or Owners) or assigning it directly to a site, administrators can provide broad access efficiently without needing to manage individual users within SharePoint. This approach is ideal for large organizations or departments, as security groups offer centralized management and can streamline permissions changes as users join or leave.
Tip: Limit direct permissions assignment to individual users to avoid complexity. Instead, use group-based permissions to simplify management.
4. Assigning and Managing Permissions
Best Practices for Assigning Permission Levels
To manage permissions effectively and securely, consider these best practices:
- Use Group-Based Permissions Over Direct User Assignments: Assigning permission levels to groups, rather than individual users, simplifies permissions management and ensures consistency. This approach makes it easy to add or remove users from a group as needed without adjusting permissions for each user individually.
- Limit Full Control to Site Owners: Restrict the Full Control permission level to the Owners group and only a few trusted administrators. Full Control provides comprehensive access, including the ability to change permissions for others, so it should be limited to prevent unintentional changes.
- Standardize Access with Default SharePoint Groups: Rely on default groups like Owners, Members, and Visitors for general permissions management. For example, use the Members group for general contributors who need Edit permissions, and the Visitors group (with Read permissions) for users who need view-only access. This standardization simplifies site management and ensures that users have access levels that align with typical roles.
- Assign M365 Groups for Cross-Functional Collaboration: M365 Groups are valuable for teams requiring access across multiple Microsoft 365 tools (e.g., Teams, Planner, SharePoint). For collaborative projects where members need access across applications, M365 Groups ensure seamless integration. However, be mindful of the default Edit permissions granted by M365 Groups in SharePoint, which may not be ideal for sensitive content.
- Use Entra Security Groups for Large-Scale or Departmental Access: Entra Security Groups are ideal for managing permissions for large departments or organization-wide access. These groups can simplify permissions updates as employees join or transition roles. Avoid using Entra Security Groups for highly customized or project-specific permissions, as centralized groups work best for broader access management.
- Regularly Review Group Membership and Permissions: Set up a process for regularly auditing permissions and group memberships to confirm that only the right people have access. Ensure that members who no longer need access are removed promptly, and that group memberships align with the current needs of the site.
By following these practices, administrators can maintain a well-organized and secure permissions structure that scales with organizational needs, supporting both collaborative and secure environments within SharePoint.
- Assign Permissions at the Site or Library Level: Avoid complex permissions at the item level.
- Use Group Permissions: Grouping users by roles or departments helps avoid clutter and eases permissions tracking.
- Enable Access Requests: This feature allows users to request access, which can be approved or denied by the site owner.
Resource: Understanding Permissions Inheritance
5. External Sharing and Access Request
External Sharing is a powerful feature in SharePoint that allows users to share sites, files, and folders with people outside the organization, such as clients, partners, or vendors. This feature is particularly useful for organizations that frequently collaborate with external stakeholders and need a secure way to provide them with access to specific content without creating full accounts in the organization’s environment.
How External Sharing Works
SharePoint’s external sharing settings can be configured at both the organization level (in the SharePoint Admin Center) and the site level. This configuration flexibility allows administrators to set organization-wide policies while enabling more specific controls at the site or library level as needed.
External sharing offers several options:
- Anyone with the Link: Allows anonymous access, where users do not need to sign in. This option provides a link that can be shared with anyone, offering either view or edit access. While convenient, it’s the least secure and should be used sparingly, especially with sensitive content.
- New and Existing Guests: Requires users to verify their identity, usually with a Microsoft account or another form of authentication. This option allows secure collaboration with external users, requiring them to authenticate before accessing shared content. It’s suitable for controlled collaboration with clients or partners.
- Existing Guests Only: Limits sharing to users who have previously been invited to the organization’s tenant. This option is more restrictive, as it allows sharing only with known external users who already have accounts.
- Only People in Your Organization: Disables external sharing entirely. This setting is suitable for sites with highly sensitive data that should remain within the organization.
Best Practices for External Sharing
Certainly! Here’s a detailed look at External Sharing and Access Requests in SharePoint Online, including how they work, their benefits, and best practices for managing them securely:
External Sharing in SharePoint Online
External Sharing is a powerful feature in SharePoint that allows users to share sites, files, and folders with people outside the organization, such as clients, partners, or vendors. This feature is particularly useful for organizations that frequently collaborate with external stakeholders and need a secure way to provide them with access to specific content without creating full accounts in the organization’s environment.
How External Sharing Works
SharePoint’s external sharing settings can be configured at both the organization level (in the SharePoint Admin Center) and the site level. This configuration flexibility allows administrators to set organization-wide policies while enabling more specific controls at the site or library level as needed.
External sharing offers several options:
- Anyone with the Link: Allows anonymous access, where users do not need to sign in. This option provides a link that can be shared with anyone, offering either view or edit access. While convenient, it’s the least secure and should be used sparingly, especially with sensitive content.
- New and Existing Guests: Requires users to verify their identity, usually with a Microsoft account or another form of authentication. This option allows secure collaboration with external users, requiring them to authenticate before accessing shared content. It’s suitable for controlled collaboration with clients or partners.
- Existing Guests Only: Limits sharing to users who have previously been invited to the organization’s tenant. This option is more restrictive, as it allows sharing only with known external users who already have accounts.
- Only People in Your Organization: Disables external sharing entirely. This setting is suitable for sites with highly sensitive data that should remain within the organization.
Best Practices for External Sharing
Educate Users on Secure Sharing Practices: Train users to choose the minimum access level necessary when sharing externally and avoid “Anyone with the link” for sensitive information.
Set Default Sharing Settings at the Organizational Level: Establish a secure baseline by configuring external sharing policies in the SharePoint Admin Center. Set stricter controls on sensitive sites or libraries.
Use Expiration Dates: Require expiration dates on externally shared links to ensure access is revoked automatically after a specified period. This feature is especially useful for temporary collaborations, as it prevents lingering access to content.
Monitor and Audit External Access: Regularly review externally shared files and folders. Use reports to identify who has access to what, and revoke access as needed.
Access Requests in SharePoint Online
The Access Requests feature allows users to request access to specific content in SharePoint when they do not already have permissions. This feature is valuable for large organizations or teams that need to balance accessibility with security, as it lets users easily request the permissions they need without administrators or site owners having to proactively manage every potential access scenario.
How Access Requests Work
When a user attempts to access content in SharePoint that they don’t have permissions for, they will see an option to request access. When they click the “Request access” button, an access request is sent to the designated approvers, typically the Site Owners or specific individuals assigned to manage permissions.
The approver will receive a notification email, and they can review and either approve or deny the request. They also have the option to customize the permissions granted if they approve. Once approved, the user receives an email notifying them of their new access.
Configuring Access Requests
To enable access requests, Site Owners can go to Site Permissions > Advanced Permissions Settings and select Access Request Settings. Here, they can configure:
- Enable or Disable Access Requests: Allow or block users from submitting access requests on specific sites.
- Designate Approvers: Specify who should receive and handle access requests, typically Site Owners or designated administrators.
Best Practices for Access Requests
- Limit Approvers to Trusted Individuals: Ensure that access requests are handled by users who understand the permissions model and organizational security policies, typically Site Owners or security personnel.
- Document Access Decisions: Track approvals and document reasons for granting access to help maintain a clear record for future audits.
- Set Up an Approval Workflow: For highly sensitive sites, consider adding a review process where access requests require multiple approvals or align with specific access policies. This helps ensure that permissions align with security standards.
- Encourage Users to Request Specific Access Levels: When submitting requests, users should specify the level of access they need (e.g., view-only or edit), helping approvers make informed decisions and reducing the risk of excessive permissions.
Resource: Manage External Sharing in SharePoint
6. Risks of Oversharing
Oversharing occurs when users share content with more people than necessary or grant higher levels of access than required. While SharePoint’s sharing features are designed to support collaboration, oversharing can lead to significant risks if not carefully managed. Here are the primary risks associated with oversharing and why it’s crucial to follow best practices for permissions and sharing.
1. Unauthorized Access to Sensitive Information
When permissions are too broadly assigned, users who shouldn’t have access to sensitive information may inadvertently gain it. Oversharing is particularly risky when it involves:
- Financial Information: Documents containing financial data, budgets, or proprietary pricing information could be exposed, leading to financial vulnerabilities.
- Personal Identifiable Information (PII): If shared improperly, PII such as employee data, customer details, or health information could result in privacy breaches and legal repercussions.
- Intellectual Property and Trade Secrets: When proprietary information or research data is shared too widely, it risks leaking critical business insights to competitors or unauthorized individuals.
Example: A finance team member shares a budget document with “Anyone with the link” access. The link could potentially be forwarded outside the organization, leading to an unintended leak of sensitive data.
2. Increased Likelihood of Data Leaks
When content is accessible to too many people, the probability of accidental or malicious data leaks rises. For instance, users might unintentionally forward a shared link to the wrong person, or a document could be downloaded and stored in an insecure location. Oversharing amplifies the risk of data leaks by broadening the access pool, making it difficult to track who is viewing and sharing sensitive information.
Example: An employee with “Edit” access to a document accidentally copies confidential information into a non-secure location, or shares it with an external partner who doesn’t have proper security safeguards in place.
3. Lack of Accountability and Control
When permissions are widely granted without clear structure, it becomes challenging to determine who is responsible for safeguarding content. Broad access leads to accountability gaps, where multiple users have permissions to modify, delete, or move content. This can result in critical files being altered or lost, affecting workflow and data integrity.
Example: Several users have “Edit” access to a project document, leading to multiple, untracked changes. When an issue arises, it becomes difficult to trace which user made specific alterations, complicating troubleshooting and accountability.
4. Compliance and Regulatory Violations
Oversharing can inadvertently lead to violations of data protection regulations such as GDPR, HIPAA, or CCPA, especially if the content contains personal data or other regulated information. Compliance standards require strict control over who can access certain types of data, and oversharing may expose an organization to penalties and audits if it’s found that sensitive information was improperly accessible.
Example: A healthcare organization allows broad access to patient records for ease of access across teams. This could result in a HIPAA violation if unauthorized employees view or share patient information outside of a designated secure environment.
5. Damage to Reputation and Trust
A data breach due to oversharing can harm an organization’s reputation, affecting trust with clients, partners, and employees. News of leaked confidential data or mishandled personal information can result in lost business, client attrition, and damaged employee morale, as well as impacting the company’s reputation within its industry.
Example: A high-profile client learns that their project data was accessible to employees outside of the client team due to oversharing, causing them to question the organization’s data protection practices.
Best Practices to Prevent Oversharing in SharePoint
To mitigate the risks of oversharing, consider implementing the following best practices:
- Apply the Principle of Least Privilege: Assign the minimum permissions necessary for users to do their jobs. Use “View” access rather than “Edit” where possible, and restrict “Full Control” to Site Owners or administrators.
- Restrict External Sharing: Limit external sharing options to “New and existing guests” or authenticated users only. Avoid “Anyone with the link” access for sensitive documents, as it’s difficult to track and manage.
- Set Expiration Dates on Shared Links: For time-limited projects or temporary external collaboration, set expiration dates on shared links to automatically revoke access after a specific period.
- Use Sensitivity Labels and Data Classification: Label content based on its sensitivity level (e.g., Confidential, Internal Only). This helps users understand the risk level of sharing certain documents and can work with SharePoint policies to restrict access.
- Regularly Audit Permissions: Schedule regular audits to review who has access to what content. Look for instances where permissions may be broader than necessary and adjust them accordingly to maintain security.
- Educate Users on Responsible Sharing: Conduct training sessions to ensure that users understand the risks associated with oversharing, especially regarding link sharing, selecting appropriate access levels, and using sensitivity labels.
By following these best practices, organizations can effectively balance collaboration with security, minimizing the risks associated with oversharing while maintaining control over sensitive information in SharePoint.
7. SharePoint Advanced Management (SAM) and Data Access Governance (DAG)
SharePoint Advanced Management (SAM)
SharePoint Advanced Management (SAM) is an add-on for Microsoft 365 that provides enhanced security, compliance, and management capabilities for organizations that require robust data protection and permissions management. SAM is especially beneficial for organizations handling sensitive or regulated data, as it provides additional tools for enforcing security policies, managing permissions, and monitoring data access across SharePoint.
Key Features of SharePoint Advanced Management
- Advanced Permissions Management: SAM offers enhanced tools to manage permissions at scale, making it easier for administrators to review and control access across large SharePoint environments.
- Conditional Access Policies: SAM enables integration with Microsoft Entra (formerly Azure AD) Conditional Access, allowing organizations to define security policies that limit access based on specific criteria such as device type, location, and user risk level. For example, users accessing SharePoint from outside the corporate network or from an unmanaged device might be restricted to read-only access.
- Access Expiration Controls: SAM allows administrators to set expiration policies for access granted to external users, ensuring that temporary collaborators lose access automatically once a project is complete. This feature reduces the risk of lingering access and enforces time-bound access for external stakeholders.
- Session Controls for Increased Security: SAM provides advanced session controls, which can limit the actions a user can perform once they’re in a session, based on the user’s risk profile or security context. This might include preventing file downloads for high-risk sessions or restricting the use of certain functions based on location.
- Auditing and Compliance Reporting: SAM enhances auditing capabilities, allowing organizations to generate detailed reports on permissions, access levels, and changes made over time. These reports can be used to identify potential compliance gaps, track who has accessed specific files, and ensure that permissions align with internal policies and regulatory standards.
Licensing Note: SharePoint Advanced Management is available as an add-on for Microsoft 365 E5 and other enterprise-level licenses, allowing administrators to enable SAM’s features for individual users who require advanced data governance and compliance capabilities.
Resource: Microsoft 365 Licensing for Advanced Management
Data Access Governance (DAG) within SharePoint Advanced Management
Data Access Governance (DAG) is a specific component of SAM focused on advanced data access monitoring, reporting, and compliance features. DAG enables organizations to have deeper control and visibility over how data is accessed, shared, and managed within SharePoint Online. DAG’s features are designed to provide a clear view of permissions and access patterns, especially useful in complex or highly regulated environments.
Key Features of Data Access Governance
- Comprehensive Access Reporting: DAG provides in-depth reporting tools that allow administrators to generate reports on data access across SharePoint sites, libraries, and individual files. These reports give insight into which users or groups have access to specific content, when permissions were granted, and whether sensitive content has been shared externally. This reporting is essential for organizations needing to meet strict compliance standards.
- Sensitive Data Tracking and Monitoring: DAG works in tandem with Microsoft Information Protection (MIP) to classify and label sensitive data. Administrators can tag content based on sensitivity levels (e.g., Confidential, Restricted) and monitor how this data is accessed or shared within SharePoint. This feature helps identify and secure files that contain sensitive information, such as personal identifiable information (PII), financial data, or proprietary documents.
- Oversharing Detection and Link Usage Analysis: With DAG, administrators can track usage patterns for shared links, identifying files and folders that may be overshared or accessed frequently by external users. This insight enables organizations to identify potential security risks and address them by adjusting permissions or disabling shared links.
- Alerts and Notifications for Compliance Violations: DAG allows administrators to set up alerts for specific actions, such as when sensitive files are accessed by unauthorized users or shared externally. These alerts help organizations monitor compliance in real-time and respond swiftly to potential security incidents.
- Automated Access Reviews and Remediation: DAG includes workflows for automated access reviews, prompting Site Owners or designated approvers to review and confirm permissions on a regular basis. This feature is crucial for ensuring that access remains relevant over time and that permissions do not extend beyond a user’s needs.
Use Cases for Data Access Governance
- Data Compliance and Regulatory Reporting: DAG enables organizations to generate and archive compliance reports on data access and permissions. These reports help meet audit requirements for regulations like GDPR, HIPAA, and CCPA, demonstrating that sensitive data is properly secured and monitored.
- Proactive Management of Oversharing: By identifying shared links and external access patterns, DAG empowers administrators to detect and mitigate oversharing risks, ensuring that permissions are not excessively broad.
- Secure Collaboration on Confidential Projects: With conditional access policies and expiration controls, DAG supports secure external collaboration by granting temporary, managed access to external users while ensuring that permissions are revoked when no longer needed.
Best Practices for Using SAM and DAG
To maximize the benefits of SAM and DAG, consider the following best practices:
- Establish Clear Access Policies: Define and document clear policies on external sharing, sensitive data access, and access expiration. Use SAM’s conditional access policies to enforce these policies consistently across SharePoint sites.
- Classify Sensitive Content with Sensitivity Labels: Implement Microsoft Information Protection labels to classify sensitive data, and use DAG to monitor and control access to this content.
- Enable Access Expiration for External Sharing: When granting access to external users, set expiration dates to automatically revoke permissions after a defined period. This ensures that access is temporary and reduces the risk of lingering permissions.
- Conduct Regular Access Reviews: Use DAG’s automated access reviews to prompt Site Owners to regularly review and adjust permissions. Regular reviews ensure that permissions align with current team structures and project needs.
- Audit and Monitor for Compliance: Generate and review access reports regularly to ensure permissions remain appropriate. Use these reports to identify potential compliance gaps or permissions issues that need attention.
- Use Alerts to Monitor Key Access Events: Set up alerts for sensitive data access or unusual permissions changes. Alerts allow administrators to respond quickly to potential security incidents and adjust permissions as needed.
SharePoint Advanced Management and Data Access Governance provide organizations with essential tools to manage permissions securely, ensure compliance, and maintain visibility over data access. By using SAM and DAG together with best practices, organizations can achieve a secure and compliant SharePoint environment that enables collaboration without sacrificing data protection.
Resource: Microsoft 365 Licensing for Advanced Management
8. Avoiding Common Permissions Pitfalls
Common Pitfalls and Best Practices:
- Overuse of Unique Permissions
- Pitfall: Breaking inheritance and applying unique permissions at the item or folder level can make permissions management overly complex and challenging to audit. When permissions are too granular, it becomes difficult to track and manage who has access to specific content, leading to potential security risks.
- Example: A project library has dozens of folders, each with unique permissions. Tracking down access for each folder becomes nearly impossible, resulting in confusion and potential oversharing.
- Direct Permissions Assignment to Individual Users
- Pitfall: Granting permissions directly to individual users (rather than through groups) makes it difficult to manage and scale permissions, especially as team structures change. This approach often leads to “permission sprawl,” where it becomes unclear who has access and why.
- Example: Instead of adding users to a SharePoint group, individual users are granted access to a confidential document. As roles change, removing or updating permissions becomes a cumbersome process.
- Granting Excessive Permissions
- Pitfall: Assigning high permission levels (e.g., Full Control or Edit) more broadly than necessary increases the risk of accidental or malicious data modification. Overly permissive access can lead to unintentional changes or deletion of important data.
- Example: A department-wide group is given Edit access to a document library when Read would have been sufficient, leading to untracked edits and potential data integrity issues.
- Using “Anyone with the Link” for External Sharing
- Pitfall: Sharing documents using “Anyone with the link” allows for anonymous access, making it difficult to track and control who views the content. This method of sharing should be used sparingly, especially with sensitive or confidential information.
- Example: An employee shares a confidential project folder with “Anyone with the link.” The link is forwarded multiple times, resulting in unauthorized users accessing sensitive data without the organization’s knowledge.
- Inconsistent Permission Management Across Sites
- Pitfall: When permissions are configured differently across sites, libraries, and lists, it creates inconsistency, making it harder for users to understand and follow the organization’s permissions policies. Inconsistent permissions can also lead to access issues or accidental data exposure.
- Example: A project team has inconsistent permissions between the main site and subsites, causing confusion and leaving some users with unintended access to sensitive files.
- Not Regularly Auditing Permissions
- Pitfall: Failing to conduct regular permissions audits can result in outdated or unnecessary access, especially when team members change roles or leave the organization. Without audits, there is a risk of oversharing and unintended access.
- Example: An employee who has transferred to another department still has access to their previous team’s sensitive files because permissions were never reviewed or updated.
Best Practices for SharePoint Permissions Management
To avoid these common pitfalls, implement the following best practices:
- Apply the Principle of Least Privilege
- Best Practice: Assign the minimum permissions necessary for users to perform their roles effectively. Use View access instead of Edit where possible, and reserve Full Control for a select few administrators or Site Owners.
- Benefit: Minimizing permissions reduces the risk of unauthorized access and unintentional data changes, ensuring that users only have access to what they need.
- Use Group-Based Permissions
- Best Practice: Assign permissions to SharePoint Groups, M365 Groups, or Entra Security Groups rather than directly to individual users. Group-based permissions make it easier to manage access as team members change roles or join and leave projects.
- Benefit: Group-based permissions provide a scalable and efficient way to manage access, allowing administrators to adjust group membership rather than individual permissions.
- Limit Breaking of Inheritance
- Best Practice: Only break inheritance on permissions when absolutely necessary. Apply unique permissions sparingly, ideally at higher levels like site or library rather than on individual folders or files.
- Benefit: Limiting unique permissions simplifies permissions management, making it easier to audit access and maintain consistent security across SharePoint.
- Restrict “Anyone with the Link” Access
- Best Practice: Use “Anyone with the link” access sparingly and only for content that does not contain sensitive or confidential information. Prefer sharing options that require authentication, such as “New and existing guests.”
- Benefit: Restricting anonymous sharing helps maintain control over who accesses content, preventing unauthorized individuals from viewing or forwarding sensitive information.
- Set Expiration Dates on External Sharing Links
- Best Practice: When sharing with external users, set expiration dates for access links to ensure permissions are revoked automatically once collaboration is complete.
- Benefit: Expiration dates reduce the risk of external users retaining long-term access to sensitive information and help maintain data security.
- Regularly Audit and Review Permissions
- Best Practice: Conduct permissions audits at regular intervals to ensure that access remains relevant and that outdated permissions are removed. Involve Site Owners in the review process for site-specific permissions.
- Benefit: Regular audits help identify and correct oversharing, ensure permissions align with current team structures, and reinforce the organization’s security policies.
- Implement Access Request and Approval Workflows
- Best Practice: Enable access requests to allow users to request additional permissions when necessary, with approvals managed by Site Owners or designated approvers. Consider setting up a formal approval workflow for highly sensitive content.
- Benefit: Access request workflows give users a controlled way to request access, while Site Owners can review and approve based on organizational security policies.
- Educate Users on Responsible Sharing
- Best Practice: Conduct training for users to help them understand the organization’s permissions policies, including responsible sharing practices, selecting appropriate access levels, and avoiding oversharing.
- Benefit: Educating users reduces the likelihood of accidental oversharing and encourages users to make thoughtful decisions when sharing content.
- Use Sensitivity Labels and Information Protection Tools
- Best Practice: Classify and label sensitive content using Microsoft Information Protection (MIP) sensitivity labels, applying permissions restrictions automatically based on content sensitivity.
- Benefit: Sensitivity labels provide an extra layer of protection for confidential content, helping ensure that sensitive files are only accessible to authorized users.
By following these best practices, organizations can avoid the most common pitfalls of SharePoint permissions management. Adopting these practices leads to a more secure, efficient, and scalable SharePoint environment, enabling productive collaboration while maintaining robust access controls.
9. Automating Permissions with PowerShell
PowerShell is a scripting language that enables SharePoint administrators to automate complex or repetitive tasks, helping improve efficiency, reduce errors, and maintain consistency. With PowerShell, you can manage permissions on SharePoint sites, libraries, lists, and individual items with ease. Let’s explore how to get started, some common scripts, and best practices.
Getting Started with PowerShell for SharePoint Online
- Install SharePoint Online Management Shell: To work with SharePoint Online, you’ll need to install the SharePoint Online Management Shell, a specialized PowerShell module. You can download it from Microsoft’s official website and install it on your system.
- Command to Install:powershellCopy code
Install-Module -Name Microsoft.Online.SharePoint.PowerShell
- Command to Install:powershellCopy code
- Connect to SharePoint Online: Before running any commands, you must connect to your SharePoint Online environment.
- Command to Connect:powershellCopy code
Connect-SPOService -Url https://yourdomain-admin.sharepoint.com - Replace
yourdomainwith your SharePoint Online domain. You will be prompted to enter your credentials.
- Command to Connect:powershellCopy code
Common PowerShell Scripts for Permissions Management
PowerShell scripts can simplify various permissions tasks, such as assigning permissions, creating reports, and auditing access. Here are some commonly used scripts for managing SharePoint Online permissions:
1. Assigning Permissions to a SharePoint Group
To grant permissions to a SharePoint group on a site, library, or list:
powershellCopy code# Variables
$siteUrl = "https://yourdomain.sharepoint.com/sites/yoursite"
$groupName = "YourGroupName"
$permissionLevel = "Contribute" # Permission level (e.g., Contribute, Read, Full Control) # Connect to site and assign permissions
Set-SPOSiteGroup -Site $siteUrl -Group $groupName -PermissionLevels $permissionLevel
- Use Case: Quickly apply permissions to groups on multiple sites or subsites, particularly useful during new project setups or team onboarding.
2. Adding Users to a SharePoint Group
Add a user to a specific SharePoint group, streamlining onboarding:
powershellCopy code# Variables
$siteUrl = "https://yourdomain.sharepoint.com/sites/yoursite"
$groupName = "YourGroupName"
$userEmail = "[email protected]" # Add user to group
Add-SPOUser -Site $siteUrl -LoginName $userEmail -Group $groupName
- Use Case: Automate the addition of multiple users to SharePoint groups, ensuring new team members have the correct access without manual intervention.
3. Removing Permissions from a User or Group
To remove permissions from a specific user or group on a site:
powershellCopy code# Variables
$siteUrl = "https://yourdomain.sharepoint.com/sites/yoursite"
$userOrGroup = "[email protected]" # Can also be group name # Remove user or group permissions
Remove-SPOUser -Site $siteUrl -LoginName $userOrGroup
- Use Case: Efficiently remove access for users who no longer need permissions, such as when an employee leaves a project or team.
4. Generating Permissions Report for a Site
Create a report of all users and groups with their permission levels on a site. This is especially useful for auditing purposes:
powershellCopy code# Variables
$siteUrl = "https://yourdomain.sharepoint.com/sites/yoursite"
$outputFile = "C:\PermissionsReport.csv" # Get permissions report
$permissions = Get-SPOSiteUser -Site $siteUrl | Select DisplayName, LoginName, Role
$permissions | Export-Csv -Path $outputFile -NoTypeInformation
- Use Case: Generate detailed permissions reports for audit and compliance, helping to identify oversharing or outdated permissions.
5. Resetting Permissions Inheritance
Reset inheritance for a list or library, applying parent permissions to ensure consistency:
powershellCopy code# Variables
$siteUrl = "https://yourdomain.sharepoint.com/sites/yoursite"
$listName = "Documents" # Reset permissions inheritance
Set-SPOListInheritance -Site $siteUrl -List $listName -ResetInheritance
- Use Case: Restore permissions consistency by resetting inheritance on libraries that may have broken inheritance over time.
6. Setting Expiration Dates on Shared Links
Configure expiration dates on shared links to automatically revoke access for external users:
powershellCopy code# Variables
$siteUrl = "https://yourdomain.sharepoint.com/sites/yoursite"
$expirationDays = 30 # Set expiration date for guest access
Set-SPOSite -Identity $siteUrl -SharingCapability ExternalUserAndGuestSharing
Set-SPOSite -Identity $siteUrl -DefaultSharingLinkType AnonymousAccess -AnonymousLinkExpirationInDays $expirationDays
- Use Case: Ensure time-bound access for temporary collaborators, reducing the risk of long-term external access.
Best Practices for Using PowerShell in SharePoint Permissions Management
- Document and Version Control Scripts: Keep a centralized repository for your PowerShell scripts, including version history, purpose, and usage notes. This practice ensures consistency, helps with troubleshooting, and makes it easier for other admins to use or modify scripts as needed.
- Test Scripts in a Development Environment: Run new or modified scripts in a SharePoint development environment before deploying them to production. This reduces the risk of unintended consequences, such as accidentally modifying or revoking critical permissions.
- Automate Repetitive Tasks: For recurring permissions tasks—such as onboarding users to specific groups, generating monthly permissions reports, or auditing permissions—create automated scripts that can run on a schedule. Scheduled automation reduces the workload on administrators and ensures consistent execution.
- Use Logging for Script Execution: Log details of each PowerShell script execution, including start and end times, any errors encountered, and changes made. Logging helps in troubleshooting and provides a record of all permissions changes, supporting compliance and security audits.
- Monitor and Secure PowerShell Access: Ensure that only authorized IT personnel have access to run PowerShell scripts in the SharePoint environment. Use multifactor authentication (MFA) and role-based access control to secure PowerShell access.
- Integrate with Compliance and Security Tools: Where possible, integrate PowerShell scripts with compliance tools, such as Microsoft Information Protection, to apply sensitivity labels or data protection policies alongside permissions management. This integration allows for automated data governance alongside permissions changes.
PowerShell and Compliance in SharePoint Permissions Management
Using PowerShell for permissions management aligns well with compliance needs, as it supports detailed auditing, automated reporting, and structured access controls. Regularly scheduled scripts can produce compliance reports, track changes in permissions, and maintain audit trails for each permissions-related action. These capabilities are particularly valuable for organizations in regulated industries (e.g., finance, healthcare) that must demonstrate secure data access controls.
By leveraging PowerShell, administrators can efficiently manage SharePoint permissions, automate time-consuming tasks, and improve oversight across the organization. When used strategically, PowerShell becomes an essential tool for maintaining security, consistency, and compliance in SharePoint Online.
10. Using Third-Party Permissions Management Tools
Third-party tools can significantly enhance permissions management:
- AvePoint: Advanced permissions reporting, compliance monitoring.
- Quest (Metalogix): Comprehensive permissions auditing and bulk management.
- ShareGate: Monitoring and bulk editing for efficient permissions management.
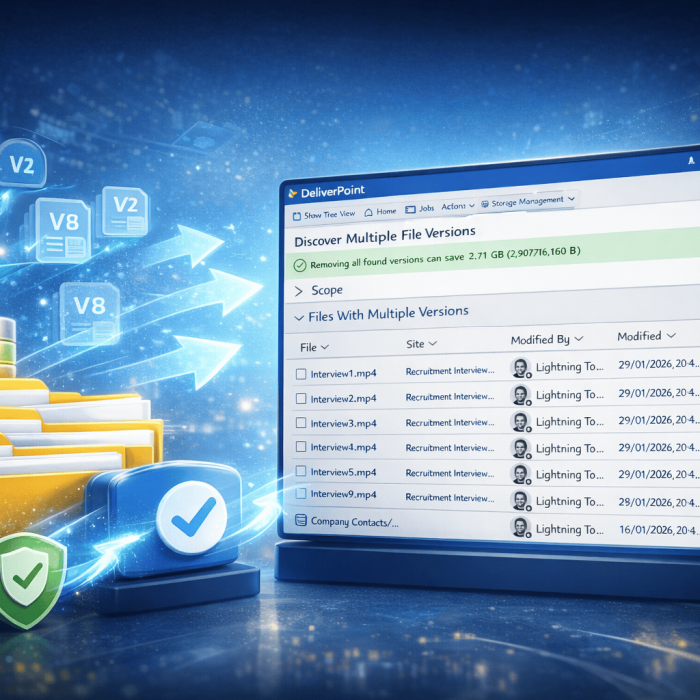
- DeliverPoint by Lightning Tools: Real-time permissions visibility, reporting, and management.
Example: A team using DeliverPoint reduced permission sprawl by 40% in three months by automating access reviews and centralizing permission reporting.
Resource Links: AvePoint, Quest, ShareGate, DeliverPoint
Fun Fact:

11. Understanding Microsoft Copilot and SharePoint Permissions
Microsoft Copilot is an AI-powered tool designed to assist users by retrieving relevant information across Microsoft 365 applications, including SharePoint, based on user prompts. By analyzing data from emails, documents, SharePoint content, and other sources, Copilot provides contextual answers, suggestions, and insights to support productivity and collaboration.
However, Copilot’s capabilities mean that it may surface content users request from various locations within SharePoint. Because of this, it’s essential to ensure that permissions are carefully managed, as Copilot will respect SharePoint permissions but may inadvertently reveal sensitive information if permissions aren’t sufficiently restricted.
Key Components to Manage Copilot Access and Data Exposure
1. Permission-Based Responses
Copilot relies on SharePoint’s existing permission structure to control which content it can access and retrieve for each user. It respects these permissions, meaning users can only see content they have been granted access to. However, it’s important to consider the following nuances:
- Risk of Broad Permissions: If permissions are too broad (for example, if users have “Read” or “Edit” access to entire libraries or sites unnecessarily), Copilot may pull information from files users don’t strictly need for their role. Even with correct permission-based responses, this could lead to unintended data exposure if users make broad requests.
- Managing Group Permissions: Copilot will respect permissions granted through SharePoint Groups, Microsoft 365 Groups, and Entra Security Groups. To maintain control over what Copilot can access, ensure that groups are correctly set up and avoid granting high-level permissions to groups containing users without a legitimate need.
- Example Scenario: A user in the marketing department has broad “Read” access to a financial site library containing budget data. If they ask Copilot for information on “recent company expenses,” Copilot might surface details from these financial documents. Limiting permissions to only what the marketing team truly needs would prevent Copilot from drawing on these documents in responses.
2. Sensitivity Labels and Microsoft Information Protection
Microsoft Information Protection (MIP) allows organizations to apply sensitivity labels to SharePoint content, marking it with categories such as “Confidential,” “Restricted,” or “Public.” These labels can enforce specific rules around access, sharing, and retention. Sensitivity labels work in tandem with Copilot by influencing how sensitive content is handled:
- Tagging Confidential Content: Applying sensitivity labels to highly sensitive content signals to Copilot that it should handle this content with caution. For example, content labeled “Confidential” can be restricted from showing in Copilot responses, or shown with limited details depending on label configurations.
- Automated Labeling: MIP can apply labels automatically based on certain criteria (e.g., if a document contains Personally Identifiable Information, financial data, or other sensitive keywords). This automation is essential to ensure consistent labeling and protection, especially for high-volume data environments.
- Configuring Sensitivity Labels with Copilot in Mind: Configure sensitivity labels with restrictions that align with organizational policies, such as limiting access to “Internal Only” or restricting download options. These restrictions will be respected by Copilot, ensuring that sensitive information is only accessed by users with appropriate roles and permissions.
- Example Scenario: Suppose HR files contain personal information about employees. Applying a “Restricted” sensitivity label to these documents prevents Copilot from surfacing personal data in response to general queries, even if the user has broader access within the HR department.
3. Applying the Principle of Least-Privilege Access
The principle of least privilege is a security best practice where users are granted the minimum level of access required to perform their job functions. In the context of Copilot, this principle ensures that users only see information that is directly relevant to their roles:
- Minimize Access Scope: Rather than granting users broad “Read” or “Edit” access across entire sites or libraries, limit their access to only the folders or items they need. This approach not only prevents accidental data exposure but also ensures that Copilot responses are more focused on relevant content.
- Role-Based Access Control (RBAC): Use role-based access within SharePoint and Entra Security Groups to assign permissions based on users’ job functions, ensuring that only those with a legitimate need can access sensitive data. Assign permissions to groups rather than individuals to maintain scalable and organized permissions management.
- Regular Permission Audits: Conduct regular permissions audits to identify and remove unnecessary access. This is especially important as roles change or projects end. By limiting unnecessary access, you reduce the risk of Copilot retrieving sensitive information for users who no longer need it.
- Example Scenario: A project manager has “Edit” permissions on a shared project site during an active project. Once the project concludes, reduce their permissions to “Read” or remove access if it’s no longer necessary. This ensures that if the user requests information through Copilot about past projects, they don’t receive details from projects outside of their current scope.
Best Practices for Configuring Copilot with SharePoint Permissions
To fully leverage Copilot’s capabilities while ensuring security, consider the following best practices:
- Set Up Sensitivity Labels and Data Loss Prevention Policies: Configure sensitivity labels and data loss prevention (DLP) policies that align with organizational security standards. Copilot respects these labels, making them essential for protecting confidential information.
- Review Permissions Regularly: Conduct routine permissions reviews, especially on high-sensitivity sites and libraries. Adjust permissions as teams or projects change to minimize unnecessary access.
- Educate Users on Copilot Capabilities and Responsible Use: Provide training to help users understand what Copilot can access based on their permissions and how to use it responsibly. Encourage users to be mindful of the sensitivity of the data they request and guide them on how to avoid prompting Copilot for overly broad or vague information.
- Restrict External Sharing Where Possible: Be cautious with external sharing, especially in libraries where Copilot will pull content. Limit sharing options to authenticated users only and apply expiration dates to external links. This prevents Copilot from surfacing information accessible to external users who may no longer need access.
- Use Conditional Access and Session Controls: Integrate SharePoint with Microsoft Entra Conditional Access policies to apply additional security checks. Conditional Access can restrict access based on device type, location, or network, adding another layer of control over what Copilot can access in different security contexts.
Resource: Microsoft Copilot and Security Compliance
Quick-Reference Checklist
- Use Groups Over Direct Assignment
- Limit External Sharing Permissions
- Set Expiration Dates for Sensitive Links
- Automate Permissions Reporting with PowerShell
I hope you found the guide useful. The final part was to create a script for synthesia! So, enjoy this AI created video :)

^ This is not me, it is still AI :)